
|
|
Help
Parts and Pieces of a Online Store
Congratulations! You've made the decision to open an online store and become a merchant - good for you! eCommerce features make designing, creating, and managing your stores a breeze.
To help you get familiar with what you'll be working with, let's take a look at all the parts and pieces that make up a store.
The Overview Page
At the top of the page, you'll see a STORE tab. This is where you create, build, and manage your store. Everything eCommerce-related is done from here. The first thing you'll see on this page is an overview of how your store is doing.
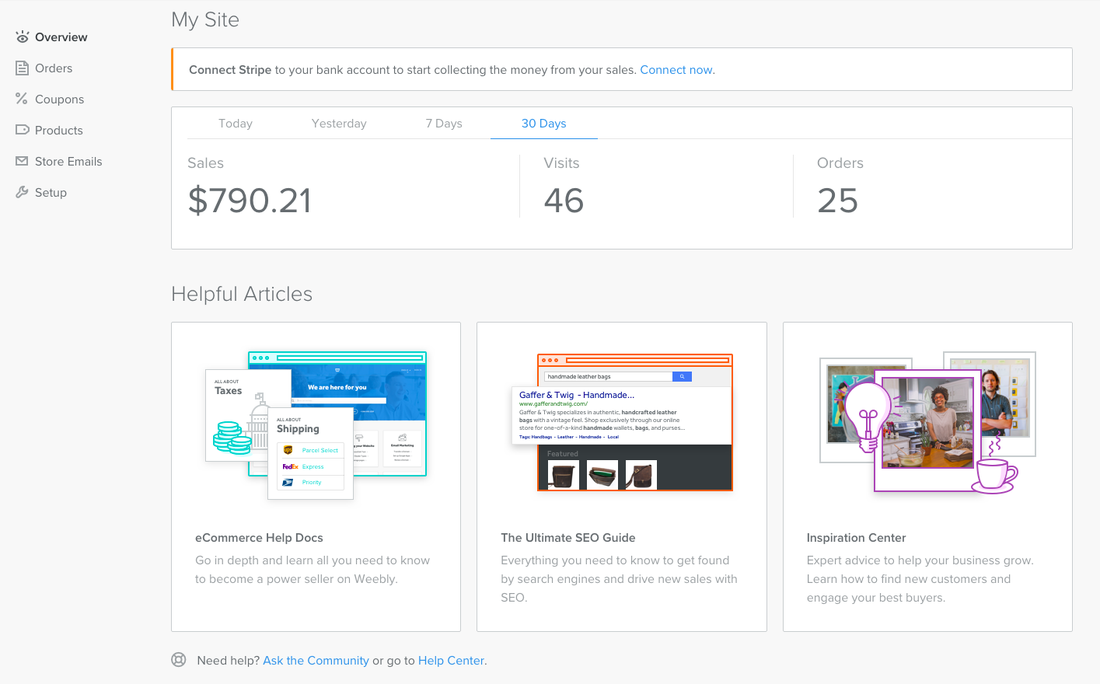
You can see the sales, visits, and orders for your store over different time periods, and also if you have any outstanding actions you need to take.
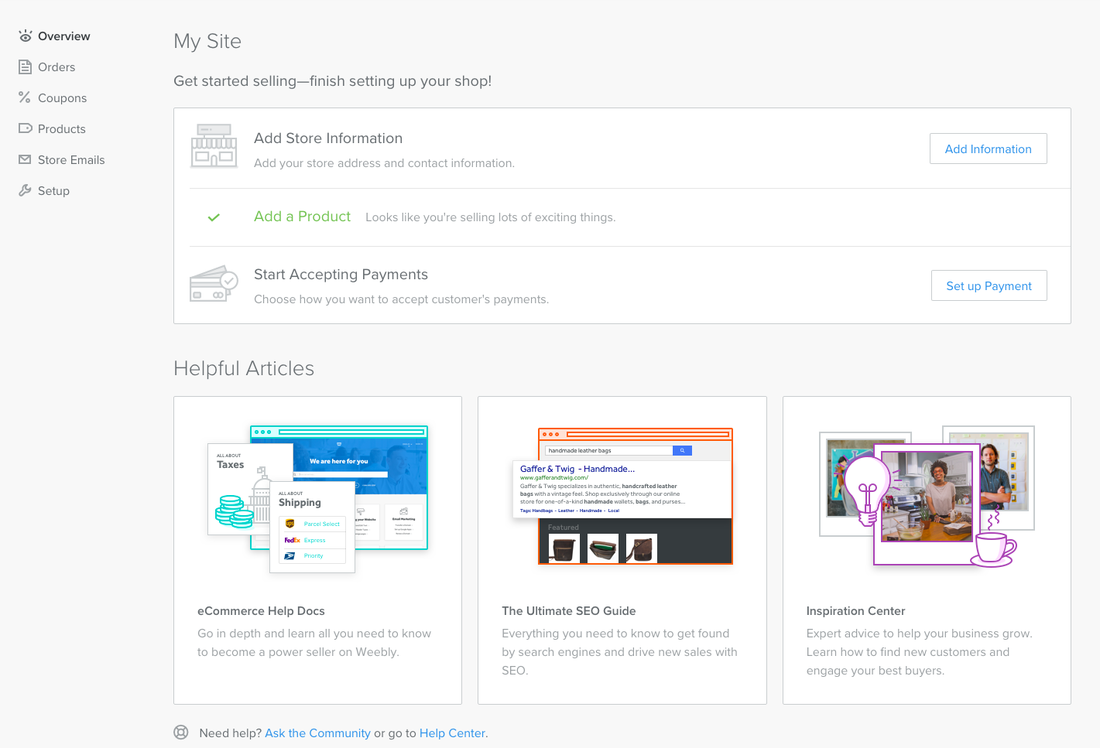
if you're starting from scratch, you'll get a handy list of steps to get your store up and running.
if you're starting from scratch, you'll get a handy list of steps to get your store up and running.
Categories, Products, and How to Display Them
A big part of your store is displaying your products. You want them to WOW your customers as soon as they land on your site. There are a number of different ways you can display your products, and most of them are fully generated for you - you don't have to worry about design, it's done for you. But if you want to take design control, you can!
Creating Categories and Products
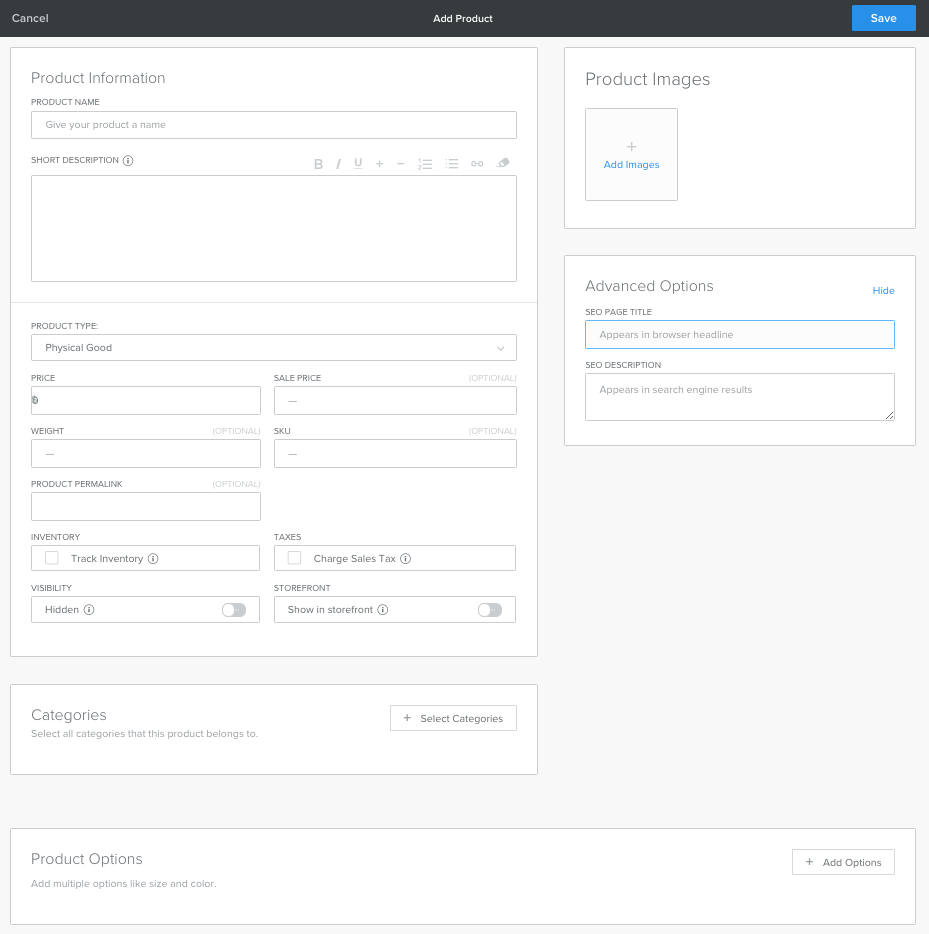
Before you can display your products, you'll need to create them. Categories are a great way to organize your products and allow your customers to find what they need quickly and intuitively. Products belong to categories, so similar items can be grouped together. Supported different product types, like physical products you ship, or digital files customers download, or services like babysitting or landscaping, and even gift certificates! So whatever you want to sell has been covered. You can add images, inventory tracking, sales pricing along with regular pricing, and even product options that allow you to sell different versions of the same product.
A big part of your store is displaying your products. You want them to WOW your customers as soon as they land on your site. There are a number of different ways you can display your products, and most of them are fully generated for you - you don't have to worry about design, it's done for you. But if you want to take design control, you can!
Creating Categories and Products
Before you can display your products, you'll need to create them. Categories are a great way to organize your products and allow your customers to find what they need quickly and intuitively. Products belong to categories, so similar items can be grouped together. Supported different product types, like physical products you ship, or digital files customers download, or services like babysitting or landscaping, and even gift certificates! So whatever you want to sell has been covered. You can add images, inventory tracking, sales pricing along with regular pricing, and even product options that allow you to sell different versions of the same product.
Once you have your categories and products created, you're ready to display them in your store.
Your Storefront
For many stores, the Storefront is first page customers see. So it needs to immediately let the viewer know whether or not they're going to find what they're looking for. It should portray you and your store's personality and easily and intuitively direct customers, not only to what they are looking for, but also to products they didn't even know they wanted! Think of that small boutique you walked into and just knew you'd find something perfect for you. Think also of some of those big box stores whose layouts make sense. You know intuitively where to go to get what you need. Your Storefront needs to do the same for your store. It's a pretty big job for just one page!
To display your categories and products on your Storefront, you'll use the Categories and Products elements. You configure these elements to display specific categories and products in a specific way. And the great thing about them is that you can change that configuration without having to redesign the page! You can use one of our specialized eCommerce themes that already has these elements on a fully designed page, or you can create your own.
A published page that uses these elements displays the your chosen categories and products.
When your customers click a category or product, they're taken to generated pages.
Read on...
Generated Category Page
The generated Category page is made up of 2 dynamic areas:
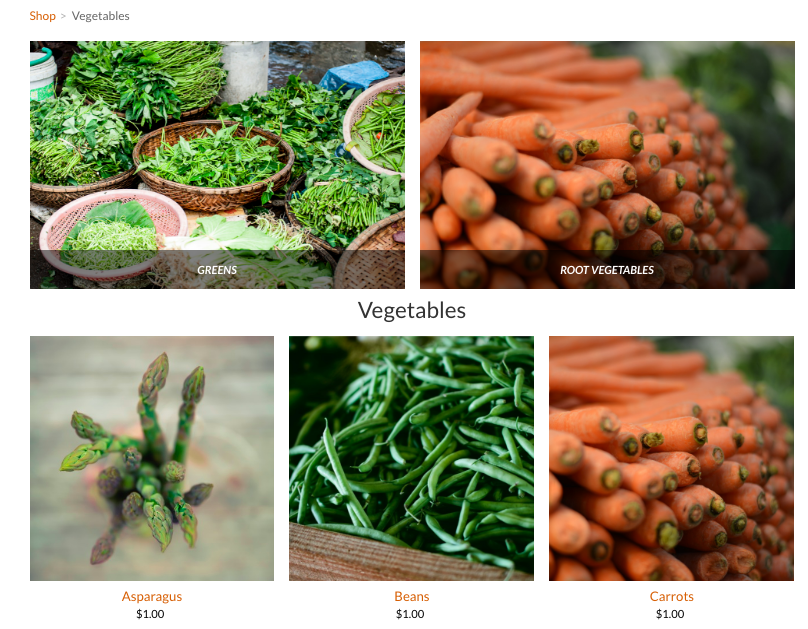
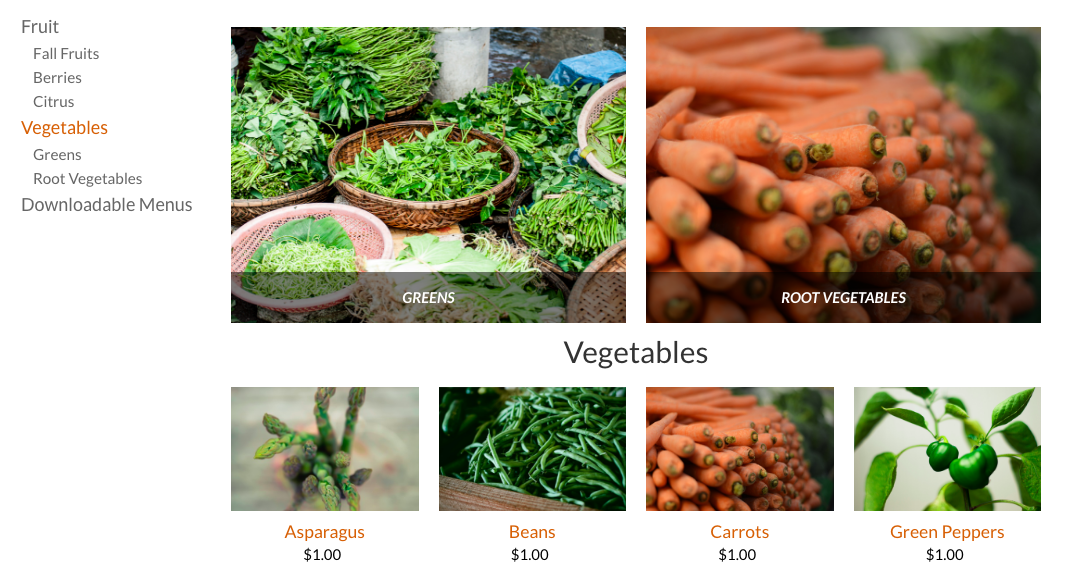
By default, the subcategories are displayed as blocks at the top of the page and the products are displayed underneath, using the info you entered when you created the category. If you prefer, you can change the layout of this page to display the categories as a sidebar listing all categories in a hierarchy (so you can see all the subcategories too), or show categories as both a sidebar list as well as a set of subcategory blocks at the top. The category page is also paginated when there are more products and can nicely fit on the page.
This is a Vegetables category page which displays categories as both a sidebar, and as category blocks. In this page, Greens and Root Vegetables are subcategories, and all products assigned to the Vegetable category are displayed:
Read on...
Generated Category Page
The generated Category page is made up of 2 dynamic areas:
- Sub-categories under that category
- Products in that category
By default, the subcategories are displayed as blocks at the top of the page and the products are displayed underneath, using the info you entered when you created the category. If you prefer, you can change the layout of this page to display the categories as a sidebar listing all categories in a hierarchy (so you can see all the subcategories too), or show categories as both a sidebar list as well as a set of subcategory blocks at the top. The category page is also paginated when there are more products and can nicely fit on the page.
This is a Vegetables category page which displays categories as both a sidebar, and as category blocks. In this page, Greens and Root Vegetables are subcategories, and all products assigned to the Vegetable category are displayed:
When you click on a category or subcategory you end up on that generated category page, and when you click on a product, you end up on the generated Product page. More here about configuring how your Category and Product pages display.
Generated Product Page
The product page displays the information entered when you created the product. You can decide to show a regular and a sale price, options (such as size or color), weight, and more. You can also optionally display social icons that allow your customers to share your goods on their social networks!
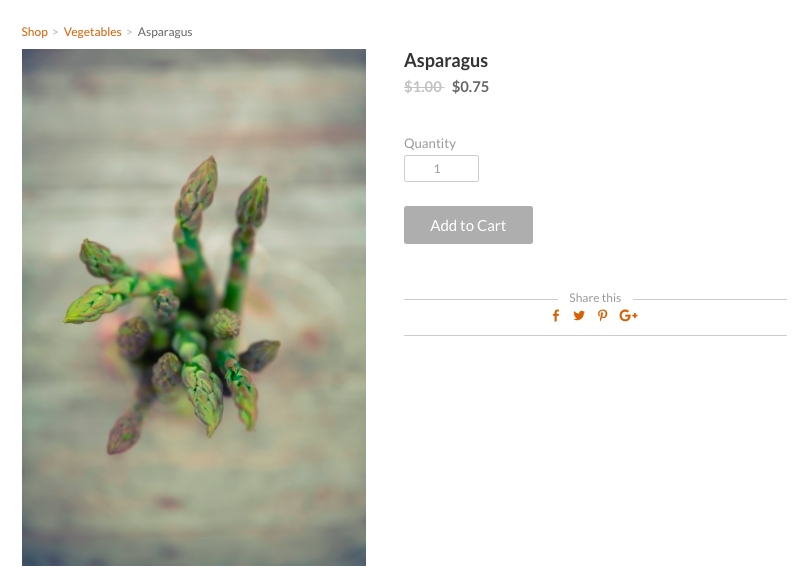
From this page, your customer adds products to their cart.
Shipping, Taxes, and Other Necessities
Running a store means you'll have set up functionality in addition to just being able to shop for products. You might need to ship those products, and you might need to charge taxes. You may want to offer coupons or use Google Analytics to help market your store. The whole process helps to make all this as pain-free as possible.
There are a number of options for shipping. You can set up different rates for different areas or different delivery methods. This flexibility means you can set up shipping to match the different methods you might use to you deliver your products. And if you don't even want to think about shipping, you can use real time shipping functionality. Once hooked up, shipping rates are determined for you by a shipping provider as the customer is checking out. No more decisions about what to charge - it's all handled for you!
Because taxes can be complicated, a number of different options are offered there too. If you ship from and to the US, you can use our automatic tax calculator. Like real time shipping, it determines the correct US taxes to charge during checkout, based on where you're located and where your customer is located. If you ship to Canada, we provide prepopulated rates for those provinces. Or you can set up your tax rates manually.
The Checkout Flow
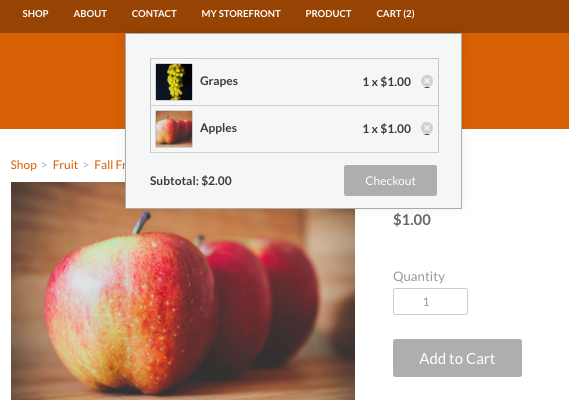
Once your site is published, your customers can start purchasing products. They'll start by adding products to their cart. Your store includes both a mini cart that customers can access as they shop, and a full cart they'll see when they're ready to checkout.
The mini cart appears in the site's navigation menu whenever a customer adds a product to their cart. Customers can click the Cart link to change their order or to start the checkout flow.
Shipping, Taxes, and Other Necessities
Running a store means you'll have set up functionality in addition to just being able to shop for products. You might need to ship those products, and you might need to charge taxes. You may want to offer coupons or use Google Analytics to help market your store. The whole process helps to make all this as pain-free as possible.
There are a number of options for shipping. You can set up different rates for different areas or different delivery methods. This flexibility means you can set up shipping to match the different methods you might use to you deliver your products. And if you don't even want to think about shipping, you can use real time shipping functionality. Once hooked up, shipping rates are determined for you by a shipping provider as the customer is checking out. No more decisions about what to charge - it's all handled for you!
Because taxes can be complicated, a number of different options are offered there too. If you ship from and to the US, you can use our automatic tax calculator. Like real time shipping, it determines the correct US taxes to charge during checkout, based on where you're located and where your customer is located. If you ship to Canada, we provide prepopulated rates for those provinces. Or you can set up your tax rates manually.
The Checkout Flow
Once your site is published, your customers can start purchasing products. They'll start by adding products to their cart. Your store includes both a mini cart that customers can access as they shop, and a full cart they'll see when they're ready to checkout.
The mini cart appears in the site's navigation menu whenever a customer adds a product to their cart. Customers can click the Cart link to change their order or to start the checkout flow.
Once a customer is ready to checkout, they'll see the full shopping cart.
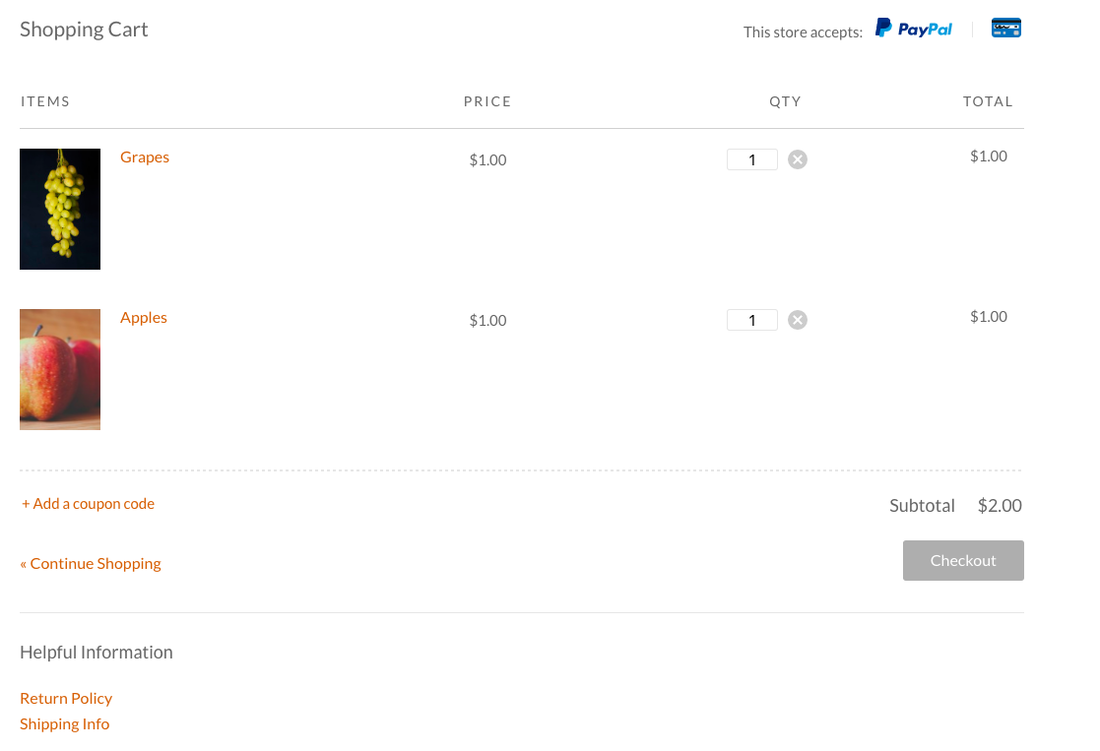
Your customer can continue shopping from here or they can checkout and pay you. What they'll see at checkout changes slightly depending on payment processors you've configured.
On the checkout page, your customer enters information like billing and shipping addresses, decides on a shipping method, decides how to pay, and reviews their order, all through a secure https connection.
On the checkout page, your customer enters information like billing and shipping addresses, decides on a shipping method, decides how to pay, and reviews their order, all through a secure https connection.
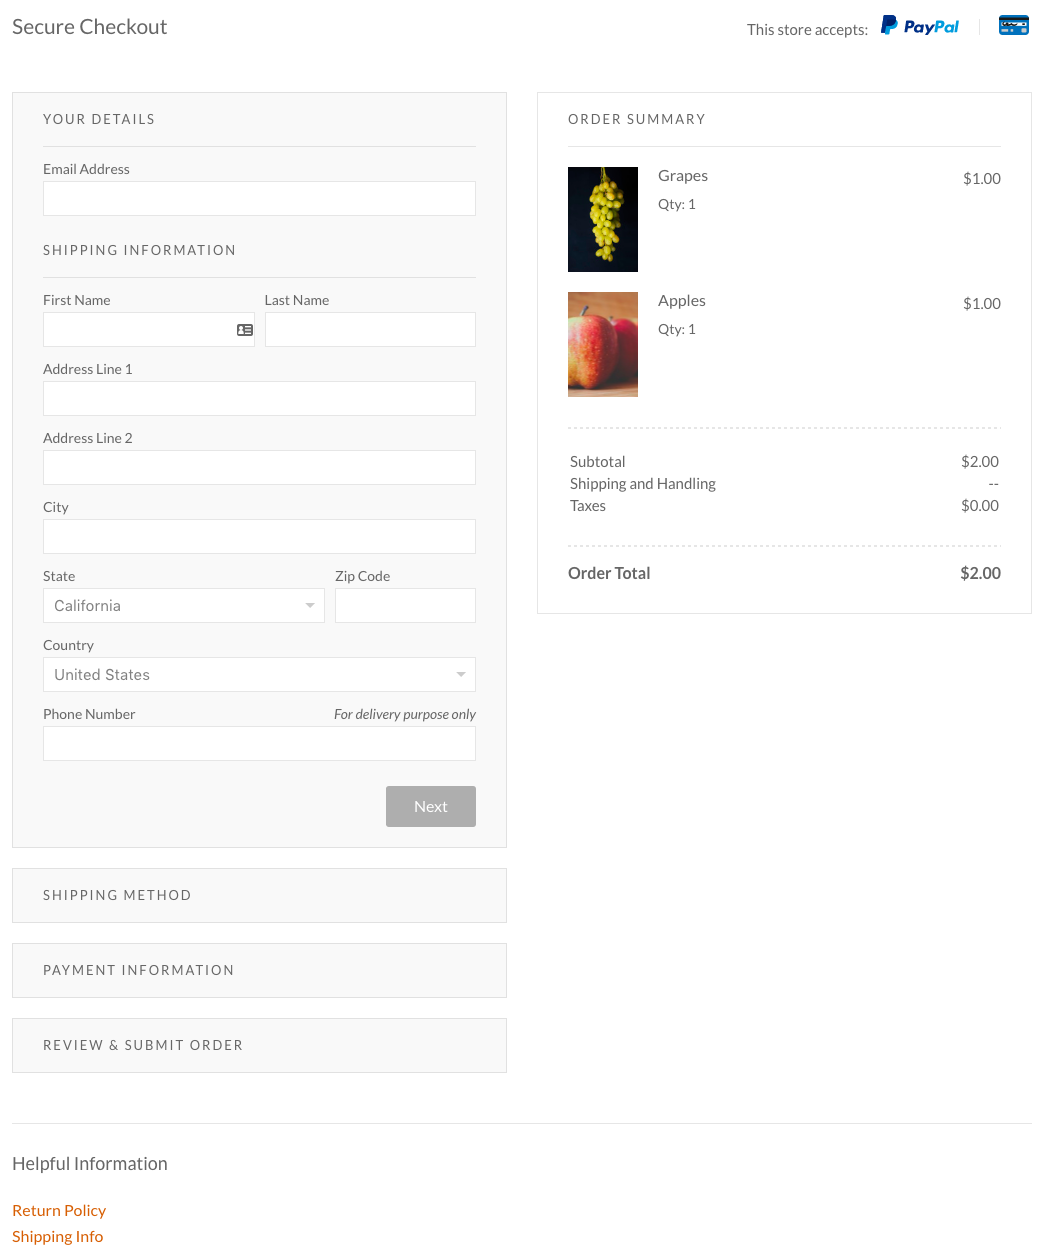
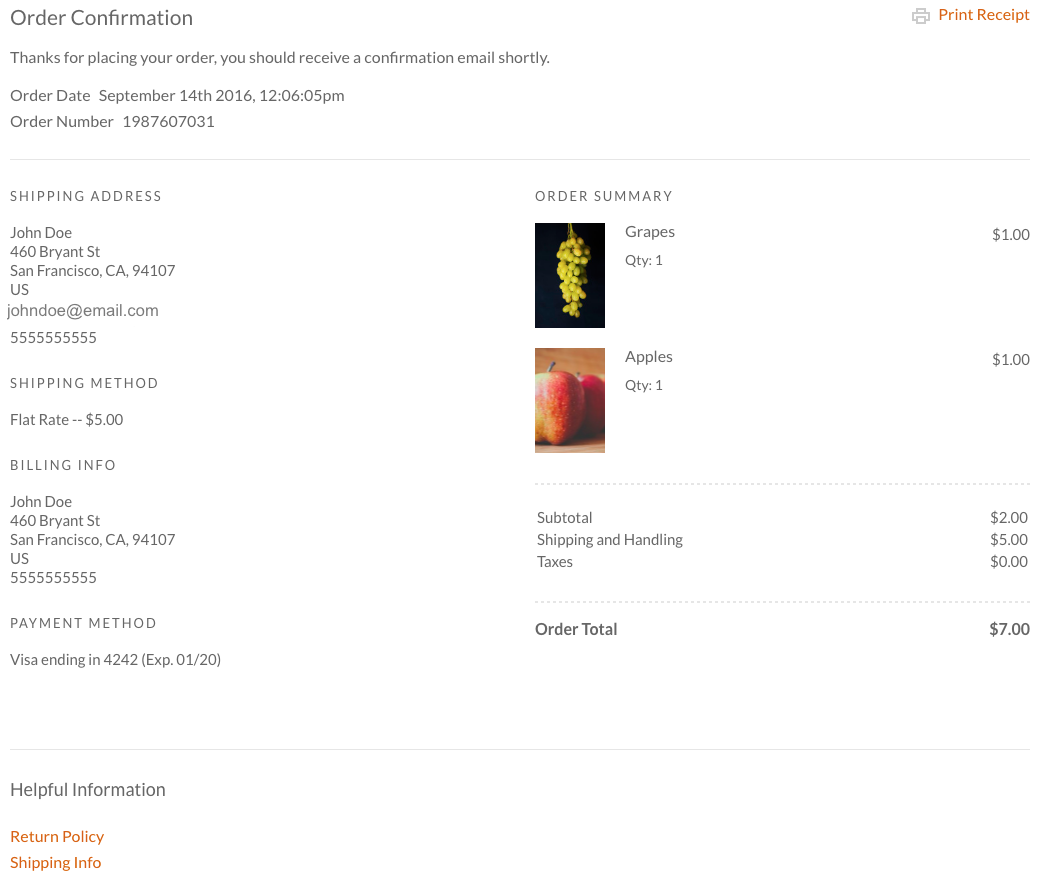
Once they've placed their order, a confirmation page displays and an email is sent to them. You can customize the email to match the theme of your store!
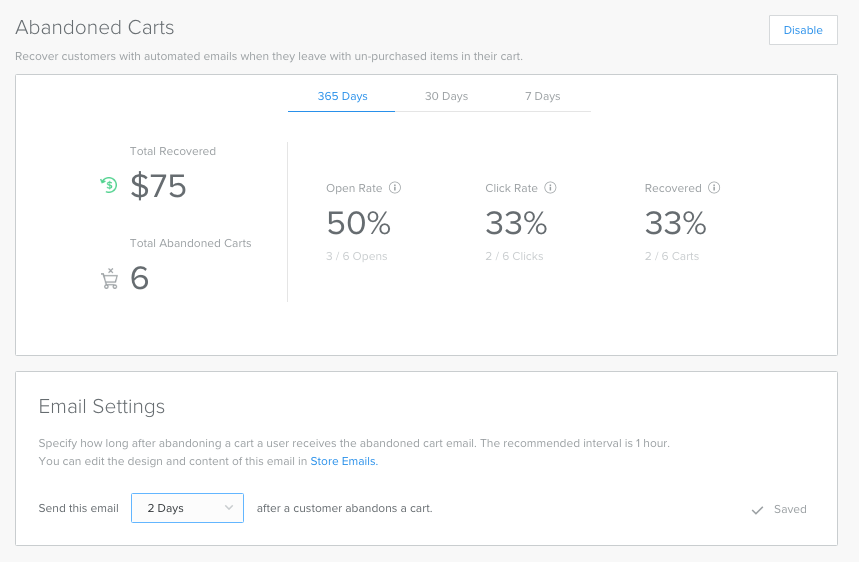
And if a customer gets to the checkout flow but never purchases their order? No worries! Automatically generate an abandoned cart email and send it to them. You can monitor how many carts are abandoned and how many result in orders.
Now that you've seen how customers create orders, let's look at how you manage them.
Manage Orders
There is the dashboard area where you can view all your current orders and their status.
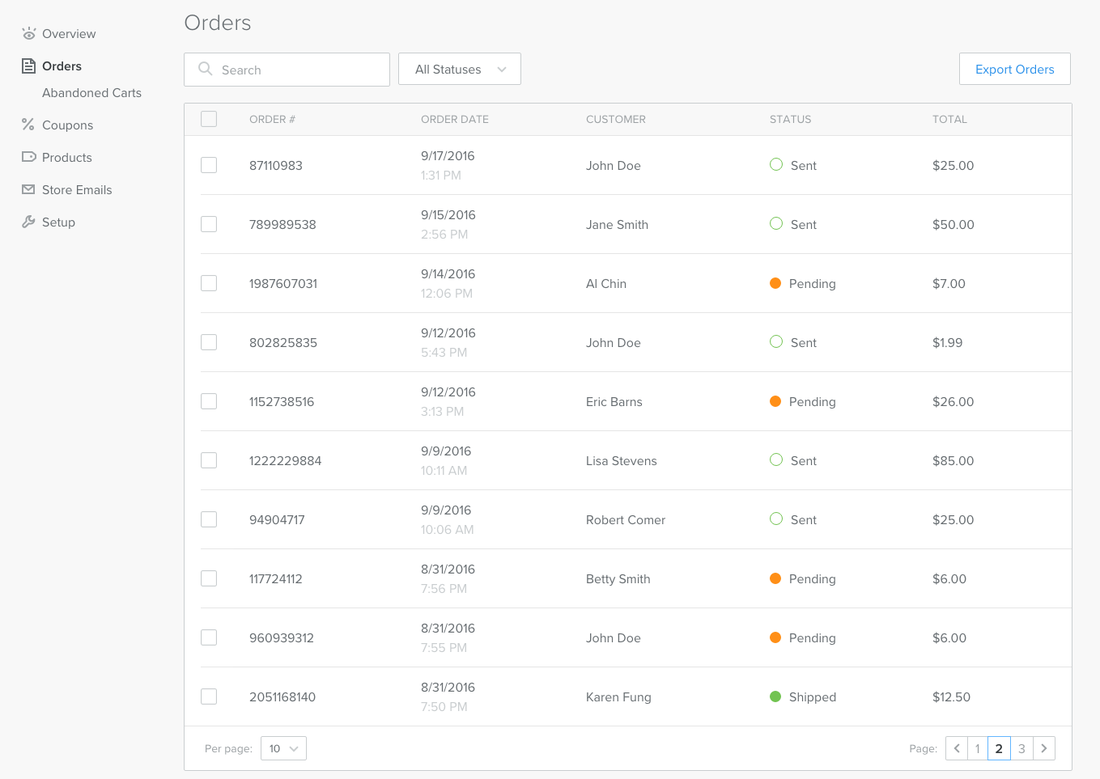
You can click on an order to manage it: print it so that you can fulfill it, mark it as shipped, refund if needed; any action you need to take on your orders can be done from here. And you can manage the order as a whole or manage individual order items for those times when not all items can ship, or not all are being returned. You can even batch process multiple orders.
Time to Build a Store
Now that you have an idea of how an online store works, it's time to build your own! Start with one of our themes to get you going. Refer to the rest of the documentation to get you through the process.