
|
|
Help
eCommerce Tracking with Google Analytics
Google Analytics provides powerful (and free) tracking for eCommerce. Take advantage of this tracking through the Setup section of your Store tab.
Before you can put any of this to use, you’ll need to set up an account with Google Analytics. If you don’t have one, this guide illustrates how to quickly get things going.
Already have Google Analytics? Excellent! Let's turn on eCommerce tracking within Google.
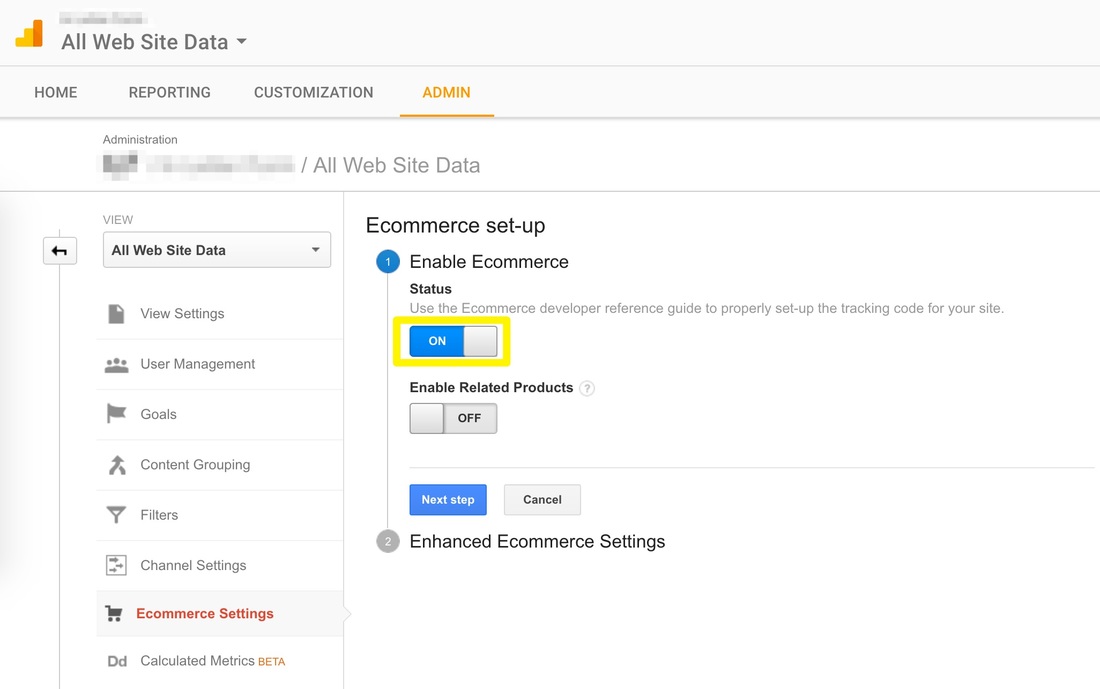
You can find this setting by going to the Admin tab of Analytics and clicking on eCommerce Settings in the far right column.
Google Analytics provides powerful (and free) tracking for eCommerce. Take advantage of this tracking through the Setup section of your Store tab.
Before you can put any of this to use, you’ll need to set up an account with Google Analytics. If you don’t have one, this guide illustrates how to quickly get things going.
Already have Google Analytics? Excellent! Let's turn on eCommerce tracking within Google.
You can find this setting by going to the Admin tab of Analytics and clicking on eCommerce Settings in the far right column.

On this page, there's a button to turn eCommerce tracking on and off. Make sure this is enabled and then submit your changes.
All done in Google. The next step is to tell your store that you want to use Analytics tracking.
Go to your Store tab, select the Setup section, and scroll to the Tracking section.
Go to your Store tab, select the Setup section, and scroll to the Tracking section.
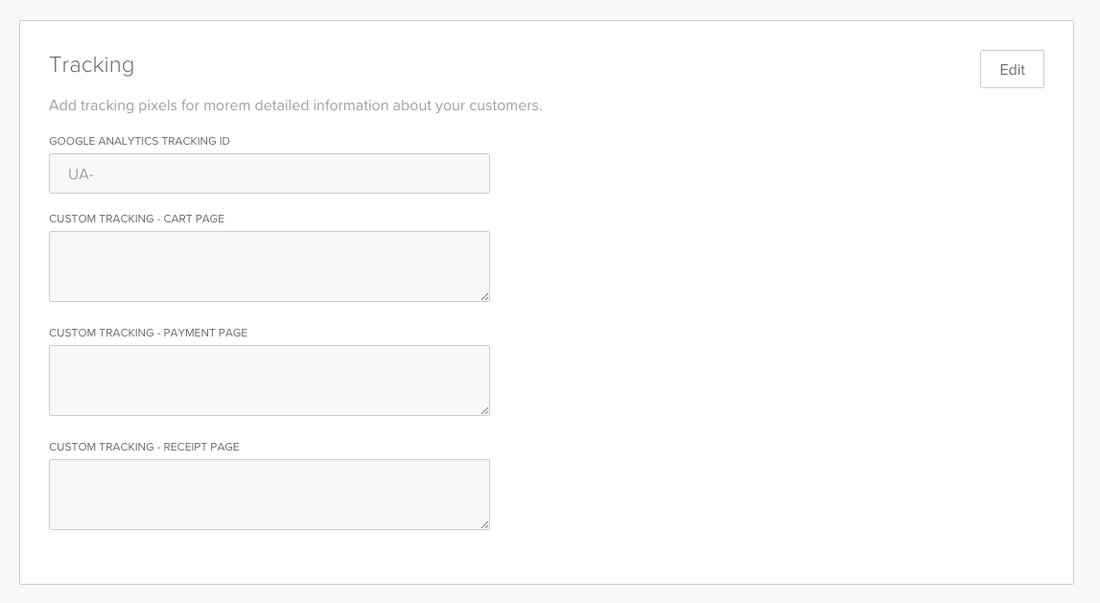
Enter your GA Tracking ID in the Google Analytics Tracking ID field.
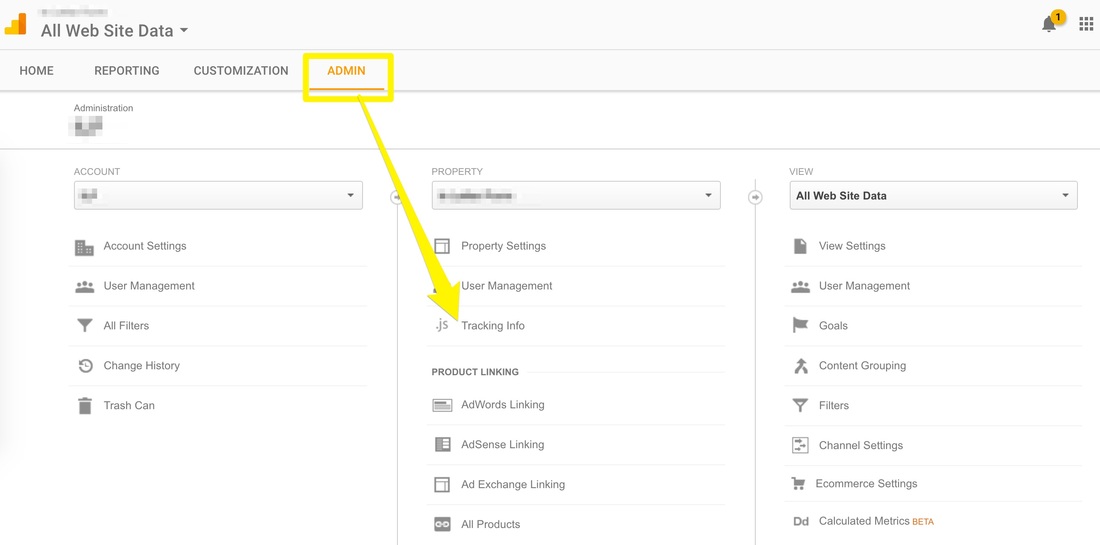
Not sure what your Google Analytics Tracking ID is? You'll find it in the Admin section of Google Analytics, under Tracking Info.
Not sure what your Google Analytics Tracking ID is? You'll find it in the Admin section of Google Analytics, under Tracking Info.
Once the code is in place, Publish your site and you're all done.
What kind of information will you get from adding this to your site? As described by Google, you can use ecommerce tracking to find out what visitors buy through your site, including information about:
Products: Which products shoppers buy, in what quantity, and the revenue generated by those products.
Transactions: The revenue, tax, shipping, and quantity information for each transaction.
Time to Purchase: The number of days and number of visits it takes to purchase, starting from the most recent campaign through the completed transaction.