|
|
Help
Organize Your Store with Categories
Categories allow you to organize your store in a way that makes it easy for your customers to find exactly what they're looking for. They are especially important when your store has many different products. Can you imagine walking into a big-box store that didn't have its products organized by departments? You'd never find anything! And that's how your customers will feel if your store doesn't have categories to help them.
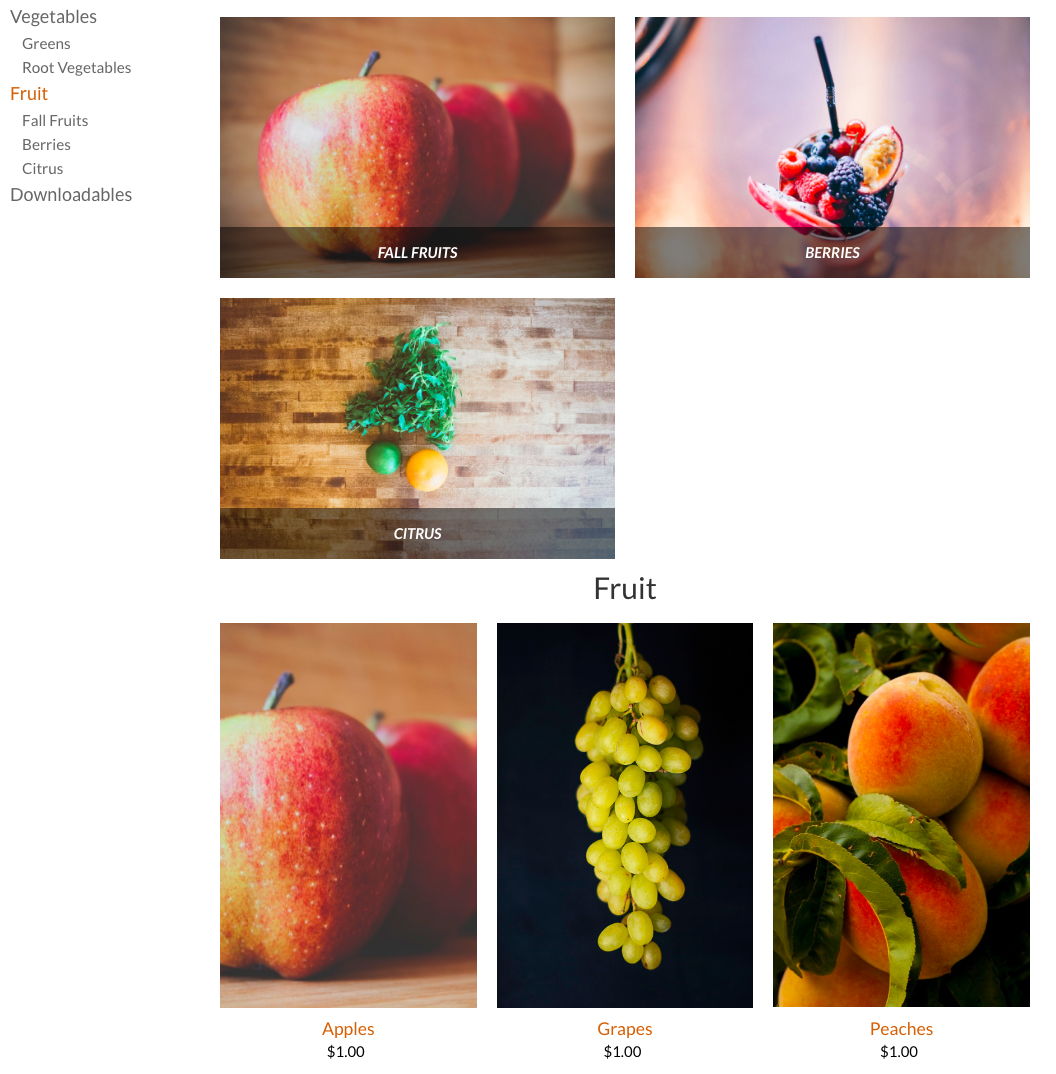
Products can belong to more than one category, so you can also use categories to feature different products. For example, you might create an "On Sale" category to showcase all your items with sale prices. Or you might create a seasonal category. When products are assigned to more than one category, they automatically show up on every assigned category page.
For example, take a store that sells apples. Say the store has both a Fruit category and also a Fall Fruit category that they display on their Storefront from September-November. They put fruit in this category that know customers are looking for during that season, making it easier for them to find it. Apples are in the Fall Fruit category, but customers are also be able to access apples by scrolling through the Fruits category page.
Create a Category
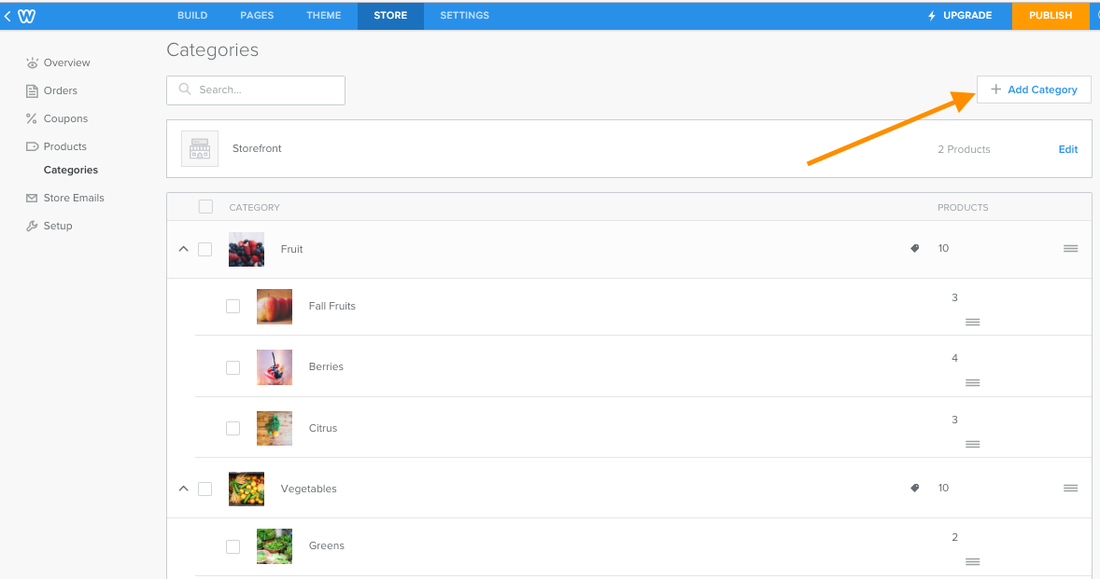
To create a category, go to the STORE tab, click Products and then Categories. All your current categories are displayed. Click Add Category.
To create a category, go to the STORE tab, click Products and then Categories. All your current categories are displayed. Click Add Category.
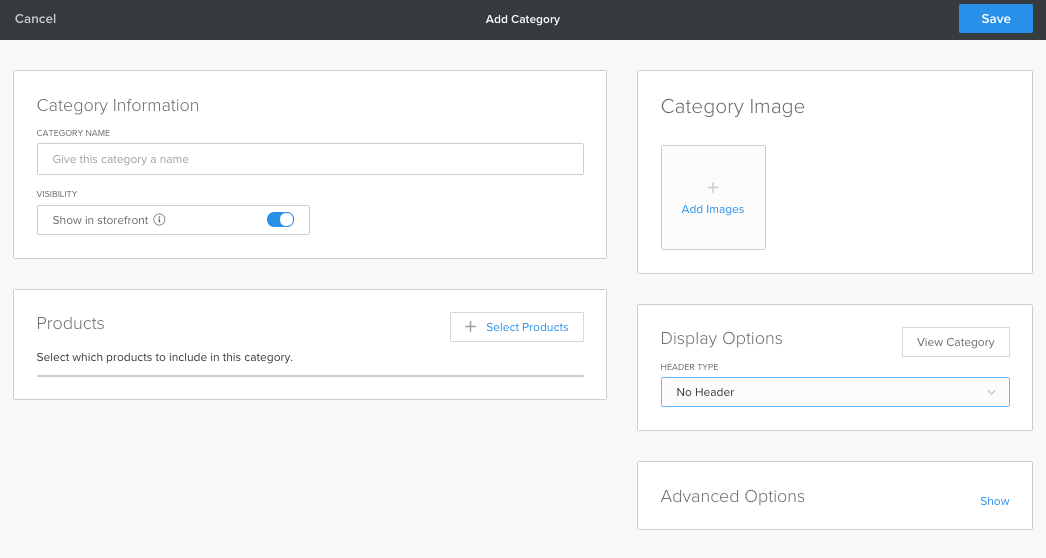
You can add a name and upload an image. You can also change the type of header that will be used on its Category page by changing the Display Options. You can view how your category will display using the different header choices by clicking View Category.
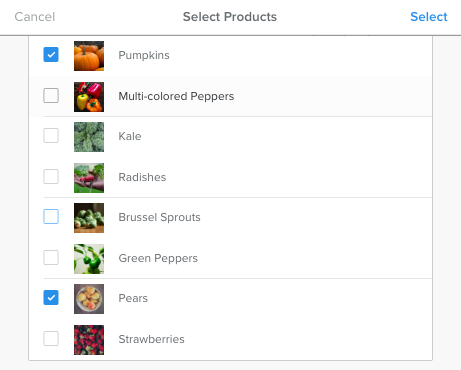
To add products to the category, click Select Products. Choose the products that you want in this category, then click Save.
You can always add more products as as needed, and products can be assigned to multiple categories.
Products are initially organized in the order in which you added them, and they'll display that way as well. You can reorder products within a category by clicking and dragging them.
Manage Categories
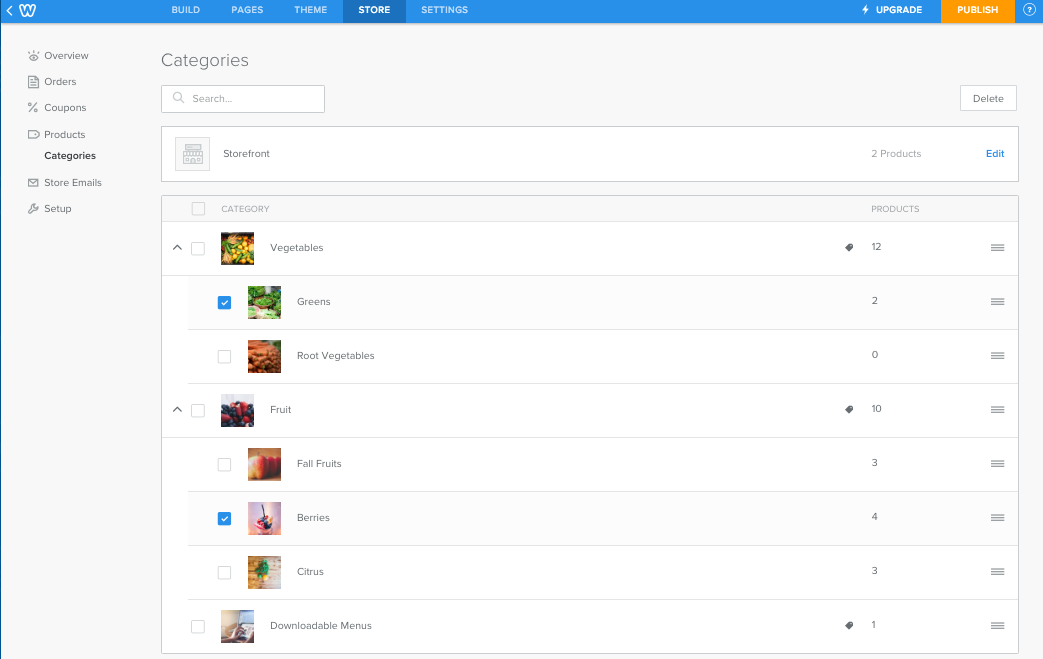
On the Category List page (STORE > Products > Categories), each category shows the image used in the store and the number of products currently in that category.
To organize categories, click and drag categories to change the order. Drag a category under and to the right of another category to turn it into a sub-category.
To delete one or more categories, click the checkbox(es) next to the category and then click Delete.
Note: Deleting a category will delete all its sub-categories, but not any products.
To edit a category, simply click on it to open its details page. Make changes and then be sure to click Save.
To delete one or more categories, click the checkbox(es) next to the category and then click Delete.
Note: Deleting a category will delete all its sub-categories, but not any products.
To edit a category, simply click on it to open its details page. Make changes and then be sure to click Save.
2010-2024. GBIZ ASIA .
A community based human edited Asia business directory
GBIZ ASIA is an initiative by SMB Grant Hub.
A community based human edited Asia business directory
GBIZ ASIA is an initiative by SMB Grant Hub.
