|
|
Help
Add a Physical Product
Physical products are goods that you physically deliver to your customer. If you plan on shipping your goods, then it's a good idea to set up your shipping rates so that customers know how their products are getting to them. And if you'll be shipping out of state (US) or out of the country, then you should also set up your taxes.
Back to adding a product!
Products can be simple, or they can be very complex. Consider this - most everything you buy has some sort of option, be it color, size, flavor, etc. Many products have more than one option. For example, a T-shirt can come in a number of colors and sizes.
The good news is you don't have to create a separate product for each variation. You can create just one product and then add options to that product (like color or size), and then values for those options (like blue, green, and S, M, and L). You choose a default variation to display on the category pages.
Note: Instead of creating each product manually, you can import product information from a CSV file.
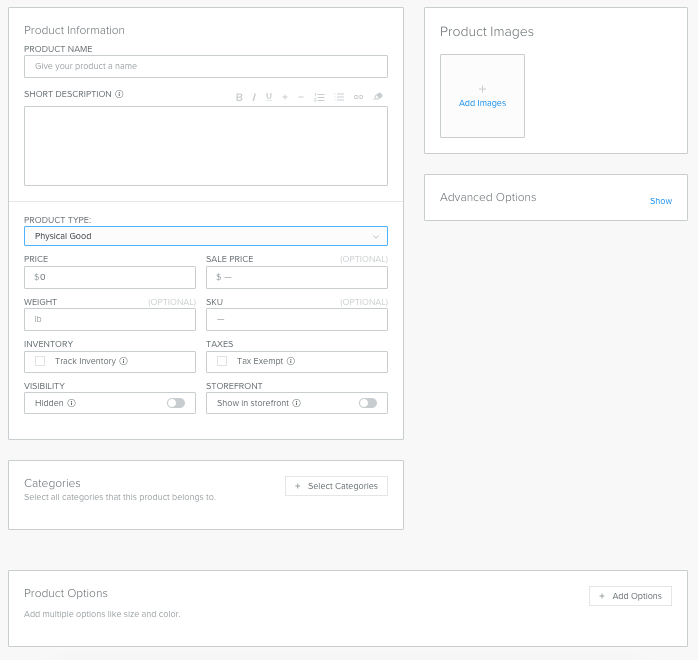
To add a physical product, go to STORE > Products, and click Add Product.
Enter a name, description, and select Physical Good as the product type.
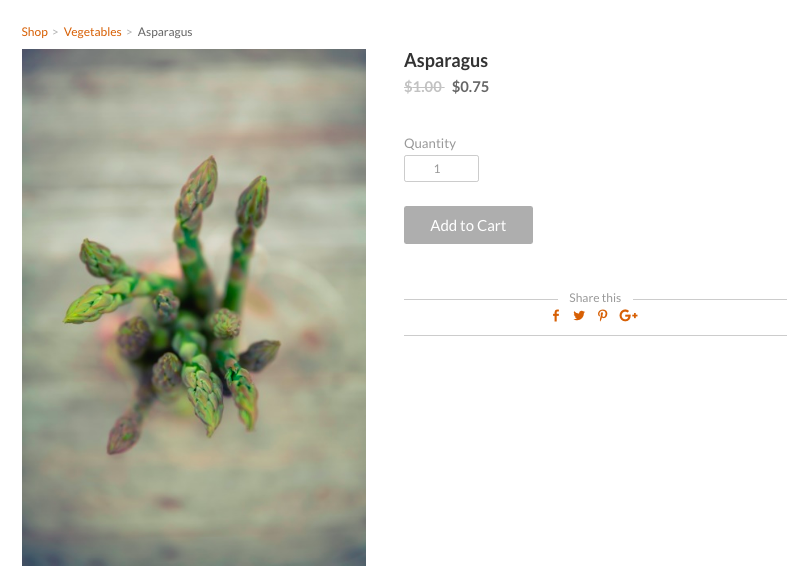
Add a price and an optional sale price. Adding a sale price causes the default price to display as crossed out and the sale price to display instead. You probably won't add a sale price when you create your product, but you might come back later and do this, when you want to run a sale.
Add a price and an optional sale price. Adding a sale price causes the default price to display as crossed out and the sale price to display instead. You probably won't add a sale price when you create your product, but you might come back later and do this, when you want to run a sale.
To add images, drag them in or click upload to choose from your computer. There are no set limits to the number of images you can upload for an individual product. If you add more than one image, the images will show up as a clickable slideshow for your customers.
Note: If your product has options, upload the images needed for those options as well. When you create your options, you'll choose from these images.
You can also optionally enter a weight (in lbs. or grams).
Note: If your store uses real time shipping, then you must enter a weight for your products.
If you use SKU numbers to manage your inventory, you can enter one here. Or you can leave this blank.
Track the inventory of your products so that you don't sell more than you have.
To track your inventory, check Track Inventory, and enter how many you have on hand. You can turn this off if you have your own way of tracking inventory.
To collect tax on this product, make sure Tax Exempt is not selected. However, only charge tax if you've set up tax rates.
To hide your product if you don't want it to show in the store yet, turn on the Hidden switch.
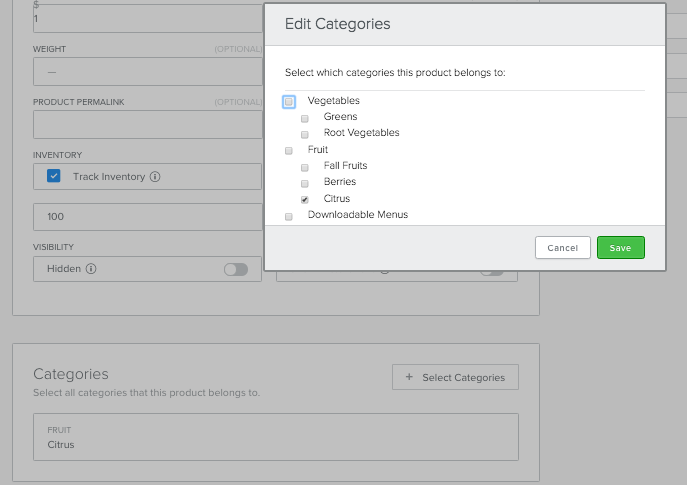
To add your product to categories, click Select Categories and choose all that your product should belong to. You can choose more than one. This product will display on each category's page that you select.
Note: If you don't have categories set up yet, you can always come back and add your product to categories, or add products when you create the categories.
When you’re done, click the Save button. You can edit a product at any time by going to STORE > Products and clicking the product you’d like to edit.
To see how your product will look in your store, click Go to product page. This will display the generated Product page in the editor.
When you’re done, click the Save button. You can edit a product at any time by going to STORE > Products and clicking the product you’d like to edit.
To see how your product will look in your store, click Go to product page. This will display the generated Product page in the editor.
2010-2024. GBIZ ASIA .
A community based human edited Asia business directory
GBIZ ASIA is an initiative by SMB Grant Hub.
A community based human edited Asia business directory
GBIZ ASIA is an initiative by SMB Grant Hub.


